Step 1 / 7
Open the menu
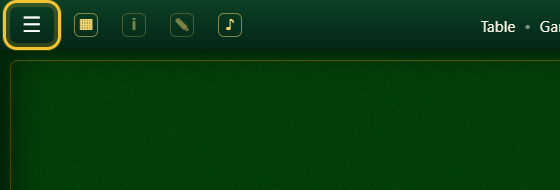
Click the three horizontal lines in the top-left corner to open the main menu.

Preview
Tournaments, voice chat at friends’ tables and an English interface. There are also many smaller improvements. Here is where to find everything.
Tournaments
Registration and tournament standings are now available within the game. Here is where to find them:
Step 1 / 7
Click the three horizontal lines in the top-left corner to open the main menu.
Step 2 / 7
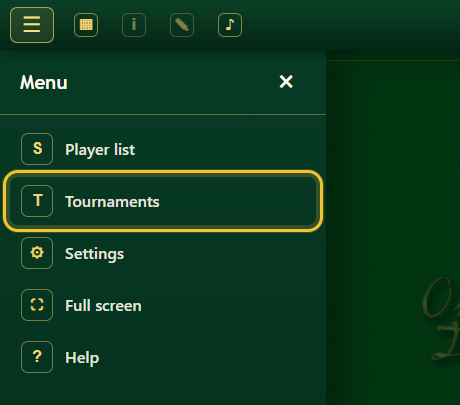
Click “Tournaments” in the menu. This opens the tournament overview.
Step 3 / 7
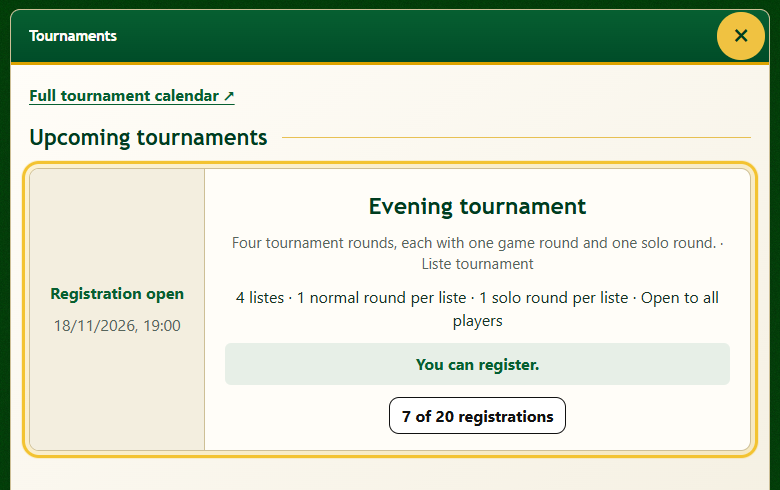
The overview shows the start time, format and entry requirements. Click a tournament to open its details. If standby places are offered after registration closes, choose “Join the standby list”. Stay online until places are allocated; a place is not guaranteed.
Step 4 / 7
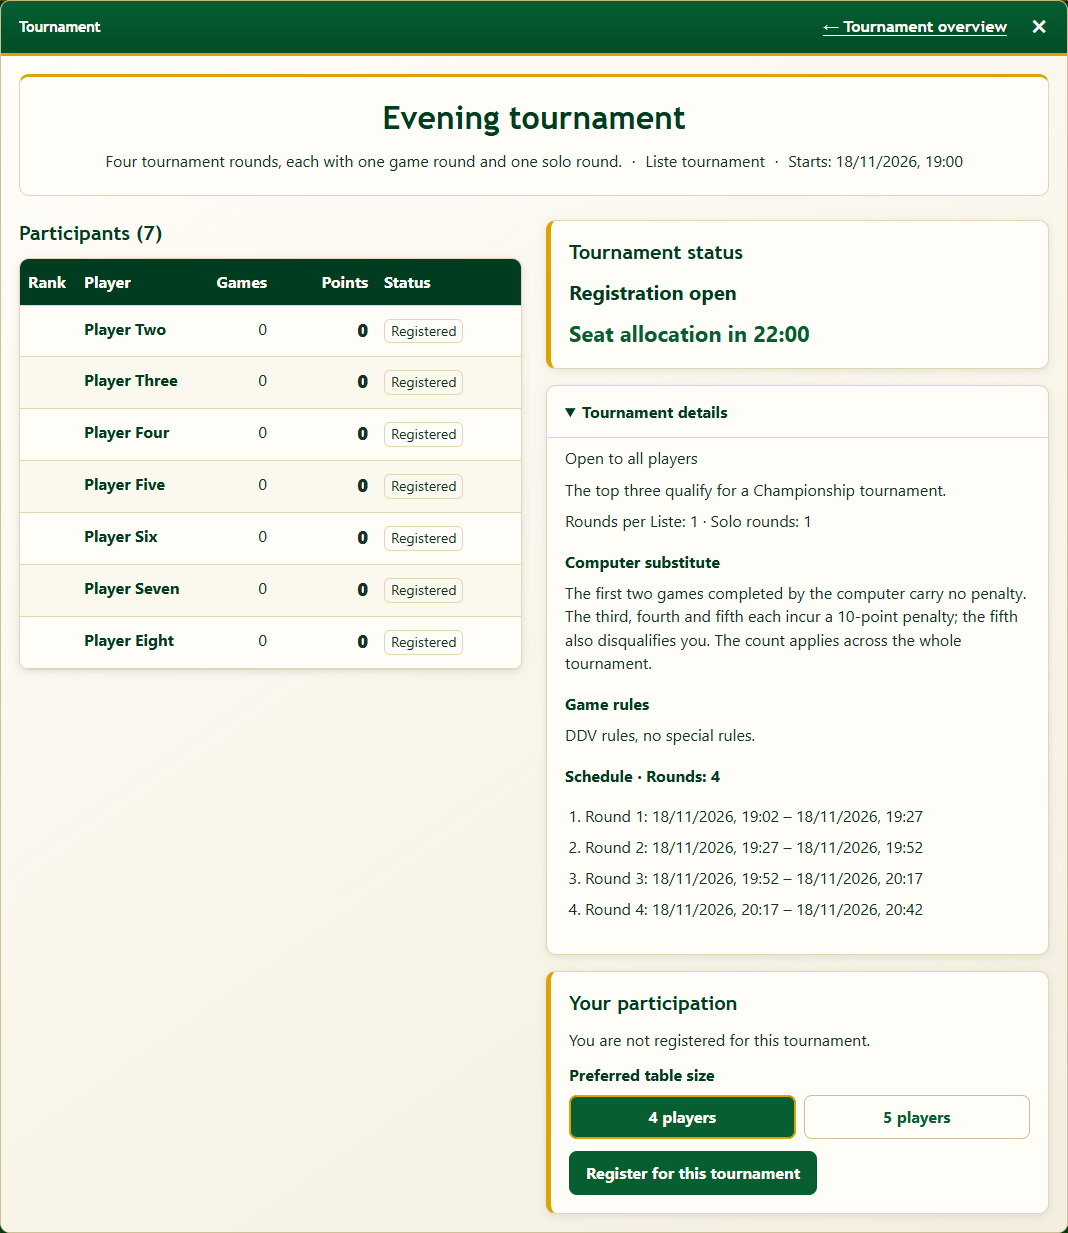
This view brings together the participants, tournament status and your registration. Expand “Tournament details” to see the format, rules and round schedule. Results also appear here during the tournament.
Step 5 / 7
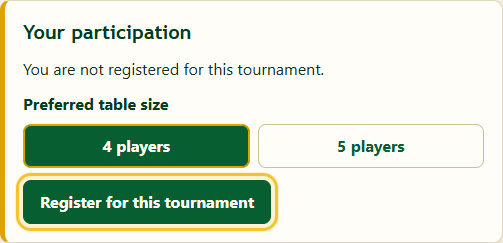
Under “Your participation”, choose your preferred table size, then click “Register for this tournament”. You can do this while registration is open, provided you meet the entry requirements.
Step 6 / 7
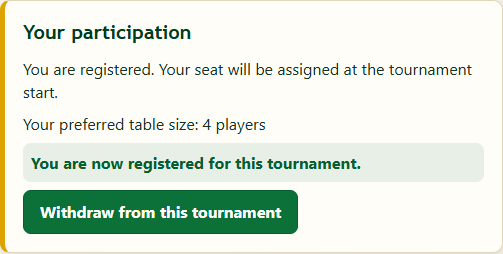
The green message confirms that you have registered. If you can no longer take part, you can also withdraw here.
Step 7 / 7
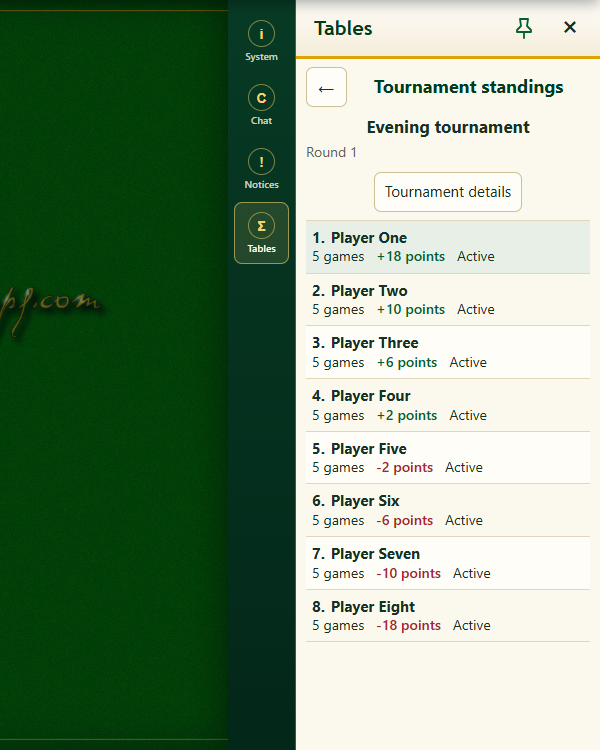
During the tournament, open “Tables” on the right and choose “Tournament standings”. You can see points and positions there, including between tournament rounds and until the tournament ends.
Example screens with fictional player names and illustrative data. Click an image to enlarge it.
Voice chat
The table host enables voice chat. Each player who wants to speak then turns on their own microphone.
Step 1 / 4
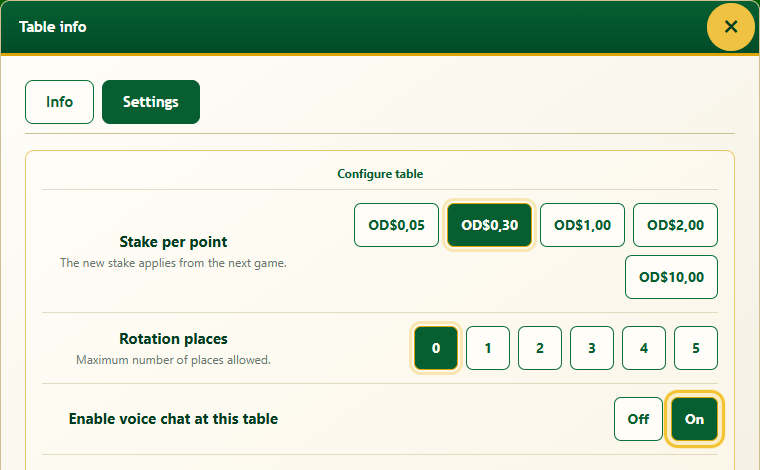
As the host, open “Table info”, then “Settings”. Set “Enable voice chat at this table” to “On”. Players at the table receive a notice.
Step 2 / 4
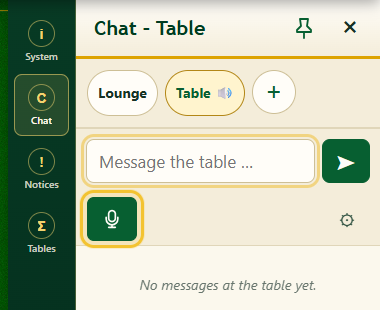
Open Chat on the right and select “Table”. Click the green microphone below the message field. If your browser asks, allow microphone access. The others can then hear you.
Step 3 / 4
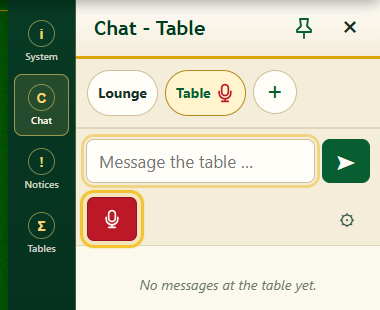
The red microphone button means your microphone is on. Click it again to turn it off. You can listen without turning on your microphone.
Step 4 / 4
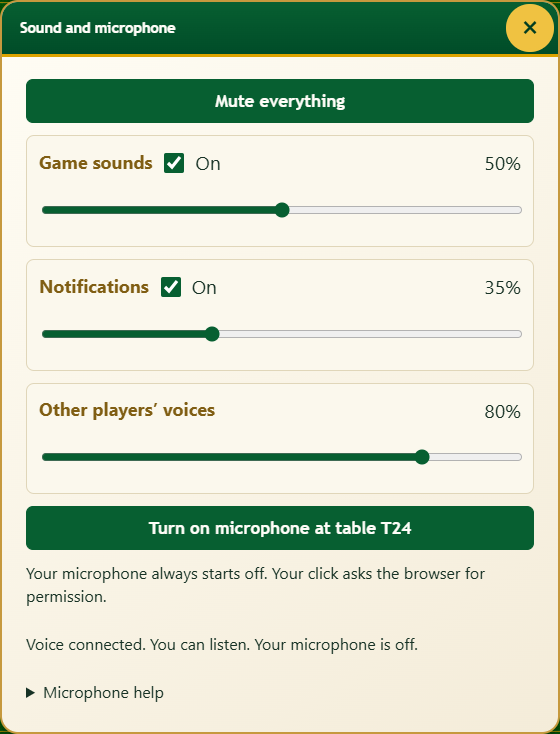
Clicking Sound now opens the sound menu instead of muting the sound as before. Adjust game sounds, notifications and other players’ voices separately. “Mute everything” mutes the audio and your microphone.
Example screens with fictional player names and illustrative data. Click an image to enlarge it.
Table message box
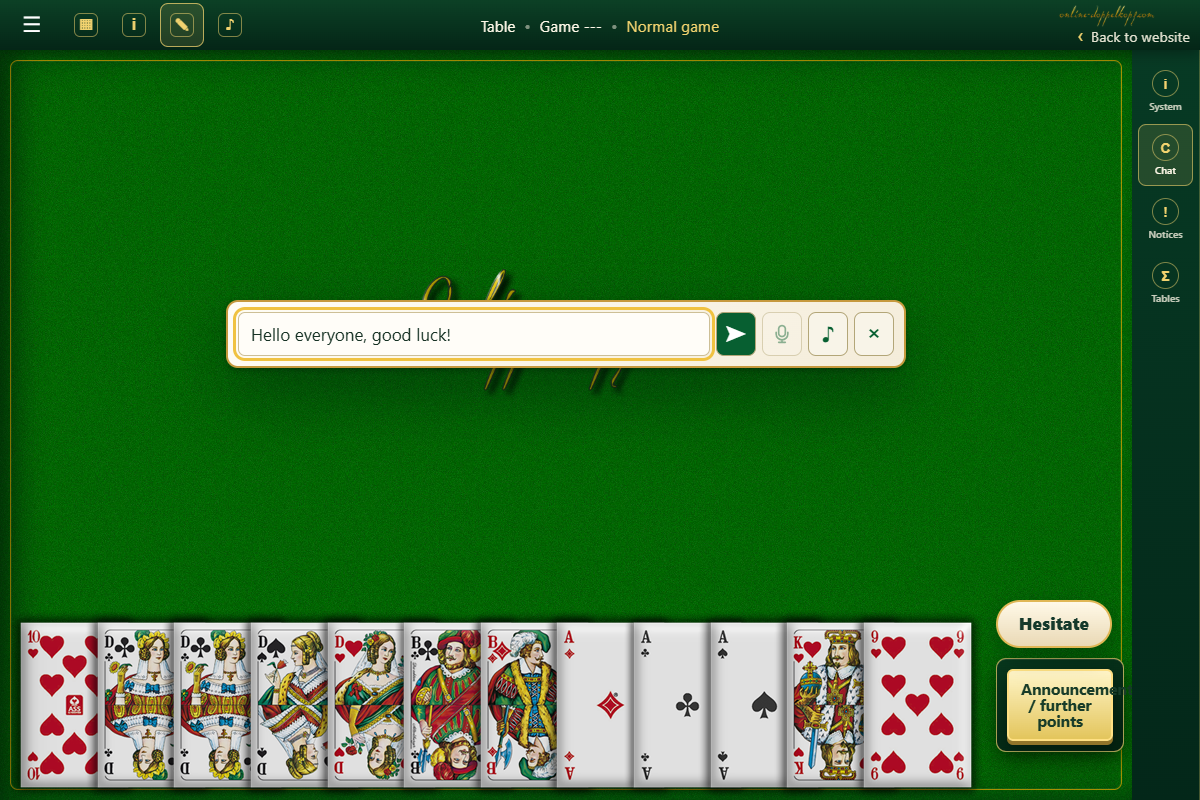
The small message box sits over the middle of the table, keeping your cards and action buttons accessible. It always sends to the table you are currently at.
Step 1 / 3
Click “Write” at the top of the game. The box opens without requiring you to select the table chat in the sidebar. The button is disabled when you are not at a table.

Step 2 / 3
Type your message and press Enter or click the arrow to send it. The box then closes, and the message appears in the table chat. You can also close it using the cross or by pressing Enter in an empty field.
Step 3 / 3
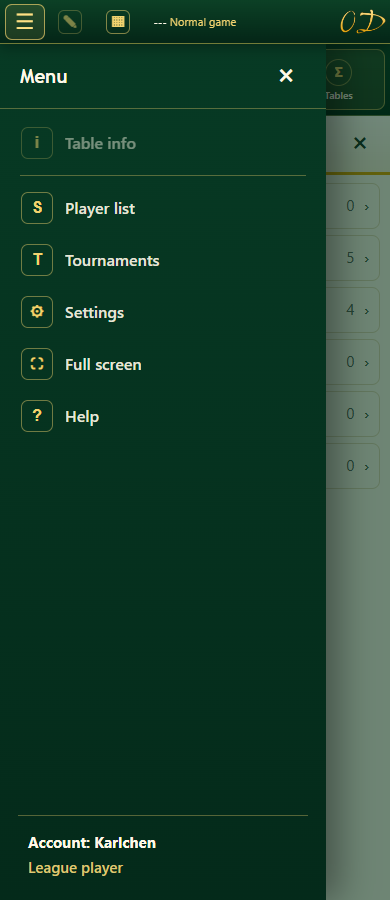
“Write” stays directly accessible in the header, even on narrow screens. As space runs out, “Sound” disappears first, followed by “Table info” and finally “Tables” moving into the main menu. You can still open the sound controls through Settings. “Full screen” is also in the main menu.
Example screens with fictional player names and illustrative data. Click an image to enlarge it.
German and English
The website and game share your saved language preference. Here is how to change it in the game:
Step 1 / 3
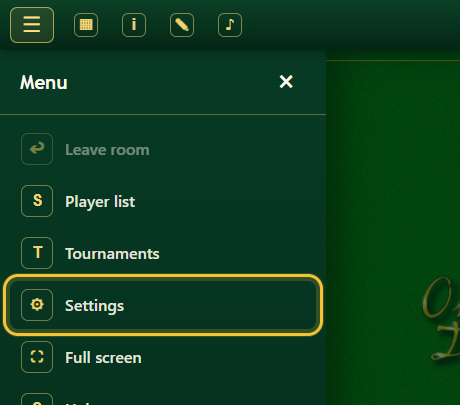
Open the main menu in the top-left corner and choose “Settings”.
Step 2 / 3
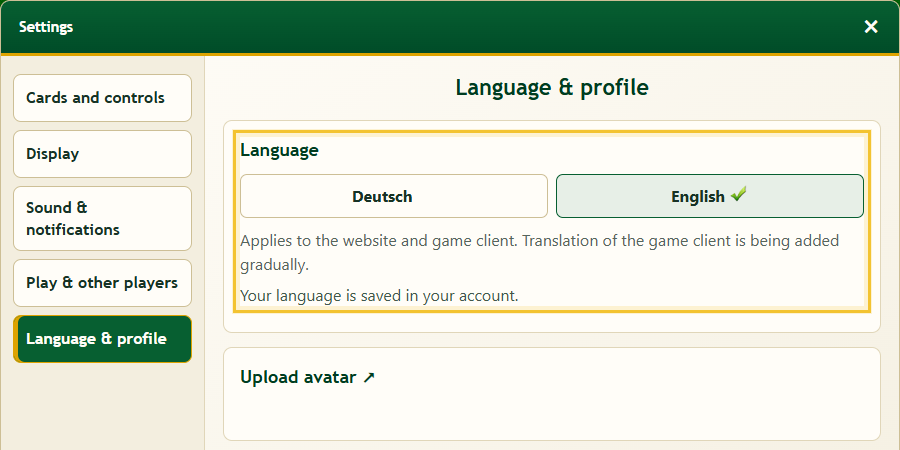
Choose “Language & profile” on the left. Under “Language”, click “Deutsch” or “English”. Your choice is saved to your account.
Step 3 / 3
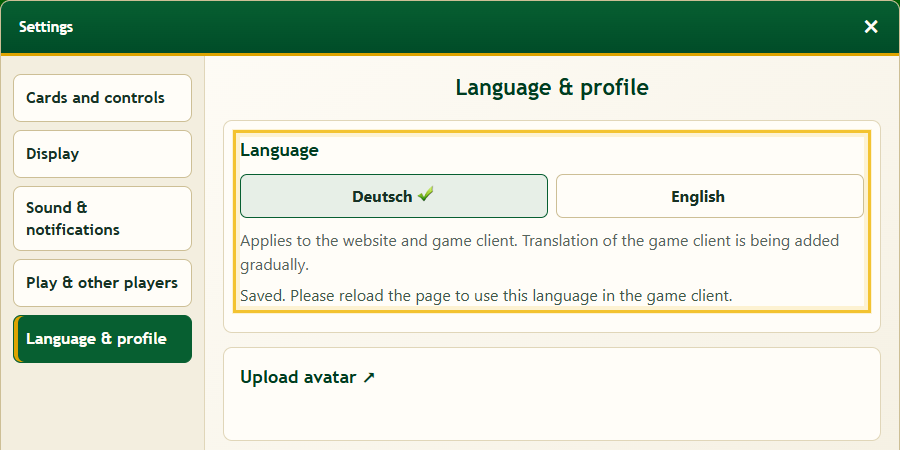
Wait for the “Saved” message. The open game keeps its current language until you reload the page. Do this after your game so you do not interrupt it.
Example screens with fictional player names and illustrative data. Click an image to enlarge it.
Tables and recent games
Open “Tables” in the sidebar to find “Score sheet”, “Tournament standings” and “Recent games”, alongside the player lists.
Step 1 / 4
In the right-hand sidebar, click “Tables” – the button with the Σ symbol. This opens the overview.
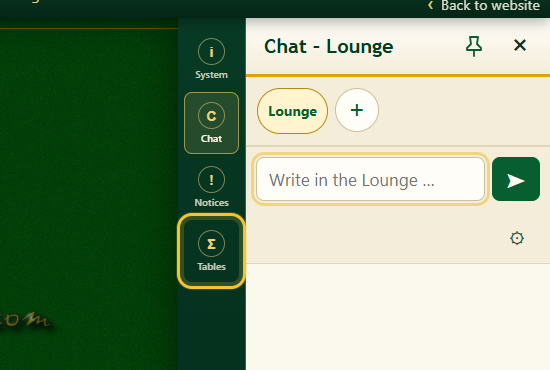
Step 2 / 4
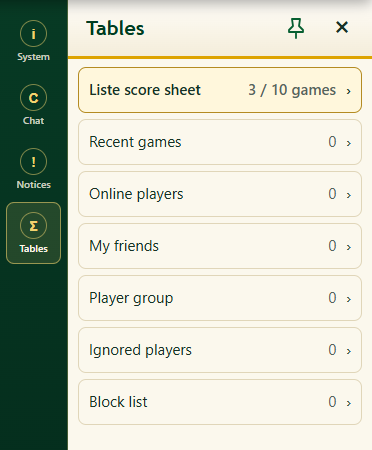
Here you will find “Online players”, “My friends”, “Player group”, “Ignored players” and “Block list”. There are also “Recent games”, the “Liste score sheet” during a running Liste and “Tournament standings” during a tournament. Choose the view you want.
Step 3 / 4
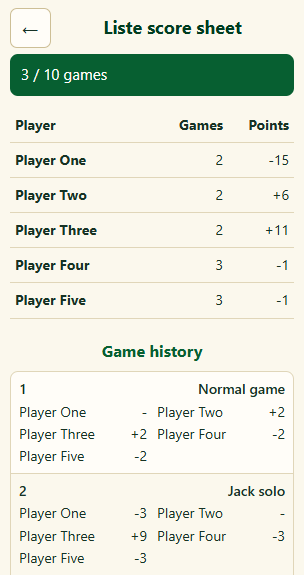
The score sheet shows the current totals and the games played in the list. On narrow screens, player scores wrap onto additional lines so you can read every name and score.
Step 4 / 4
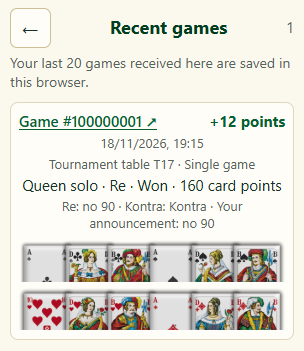
“Recent games” shows up to 20 of your games, including table type, result, Re or Kontra, announcements and your starting hand. Click the game number to open its record when available.
Example screens with fictional player names and illustrative data. Click an image to enlarge it.
Buy playing time
Purchase and renewal links in the game now open the new playing time window, without taking you through the website’s order pages.
Step 1 / 3
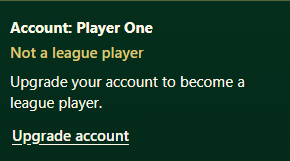
As a standard player, you can open it from the main menu at the top left. The notice about your playing time running low also links directly to this window.
Step 2 / 3
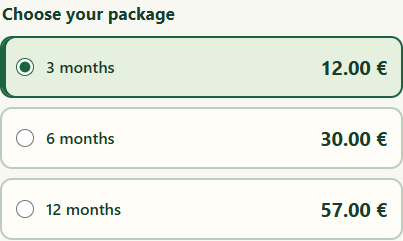
Choose six or twelve months. The introductory three-month offer also appears if you are still eligible. In the payment area, choose PayPal or another available method. SEPA direct debit appears when PayPal offers it to you.
Step 3 / 3
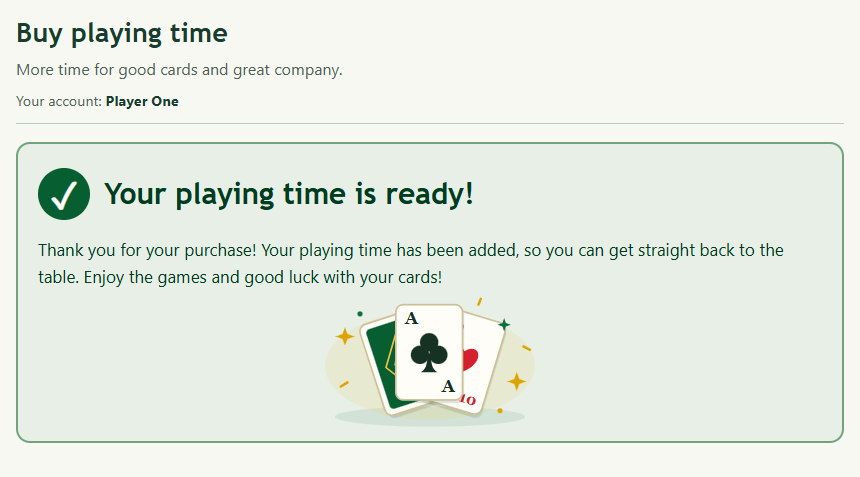
When “Your playing time is ready!” appears, the playing time has been credited. You can keep playing straight away, and any remaining time is retained. If payment is still pending, wait for confirmation rather than paying again.
Example screens with fictional player names and illustrative data. Click an image to enlarge it.
Give playing time
You can give another player one month of playing time, even as a standard player. The recipient may already have active playing time.
Step 1 / 3
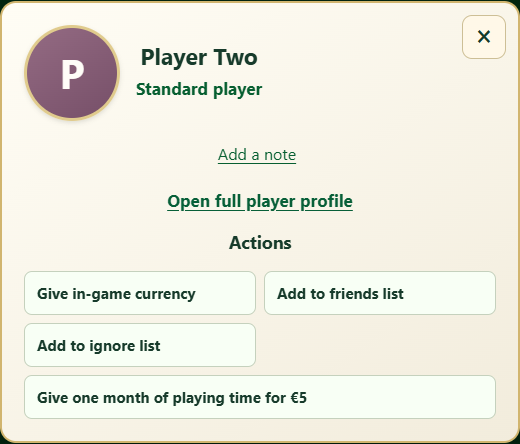
Click the player’s name. At the bottom of their details, the one-month gift button appears when they are eligible.
Step 2 / 3
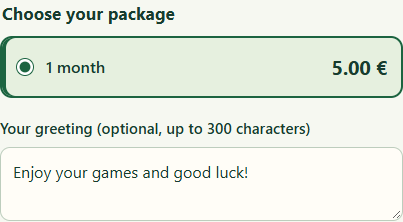
Check the recipient’s name at the top of the window and add a short greeting if you like. Then pay €5 using an available PayPal payment method. You do not need a gift code or payment reference.
Step 3 / 3
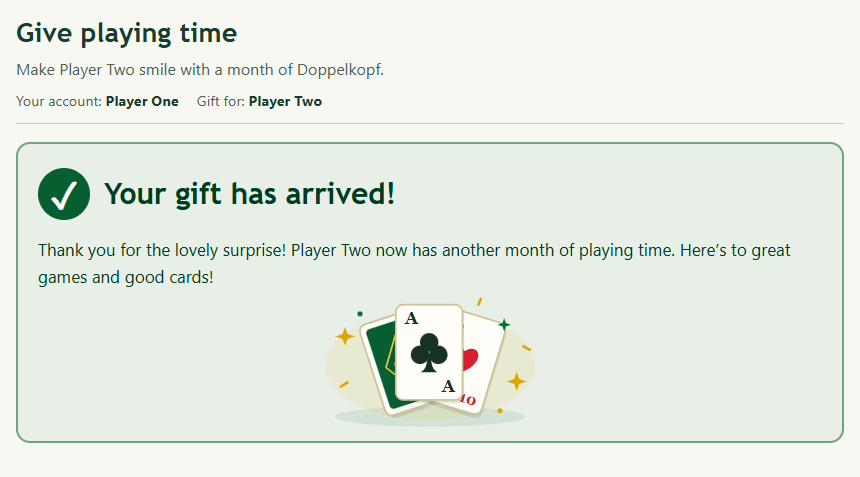
A green tick appears once payment is confirmed and playing time has been credited directly to the recipient. If they are already logged in, they do not need to log in again.
Example screens with fictional player names and illustrative data. Click an image to enlarge it.
Settings
The larger settings window is organised by topic: cards and controls, display, sound and notifications, play and players, and language and profile.
Step 1 / 2
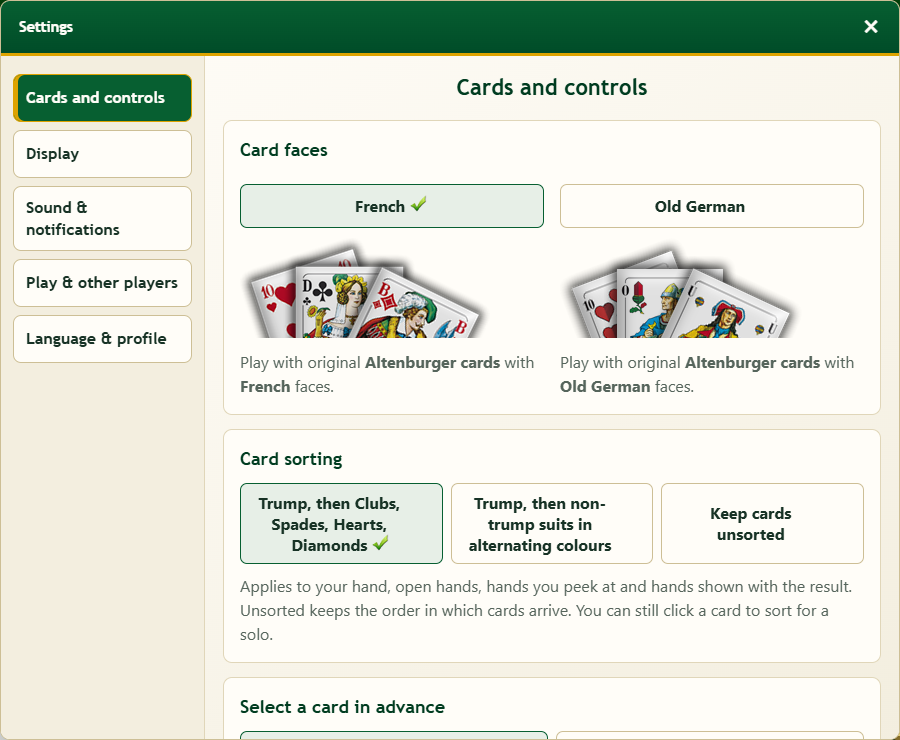
Open “Settings” in the main menu. “Cards and controls” brings together card design, sorting, preselection and automatic play of the final card. Use the buttons on the left to open the other categories.
Step 2 / 2
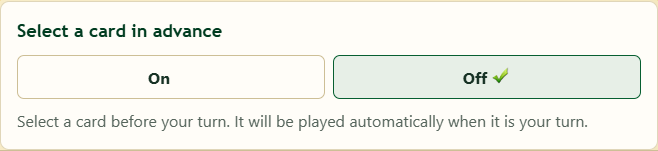
“Select a card in advance” is on by default: you can select a card before your turn, and it will be played automatically when your turn starts. Choose “Off” if you prefer to select cards only during your turn. Your choice is saved.
Example screens with fictional player names and illustrative data. Click an image to enlarge it.
Forum and polls
Poll topics have their own badge. The question appears in the first post, with the usual discussion below. Administrators can create polls; group leaders can create them only in their own group.
Step 1 / 2
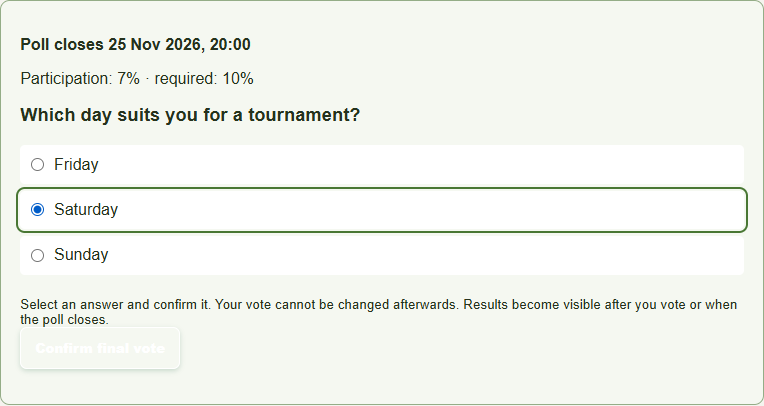
As a league player, select an answer and submit your vote. Your vote is final and cannot be changed. While the poll is open, its results remain hidden until you vote.
Step 2 / 2
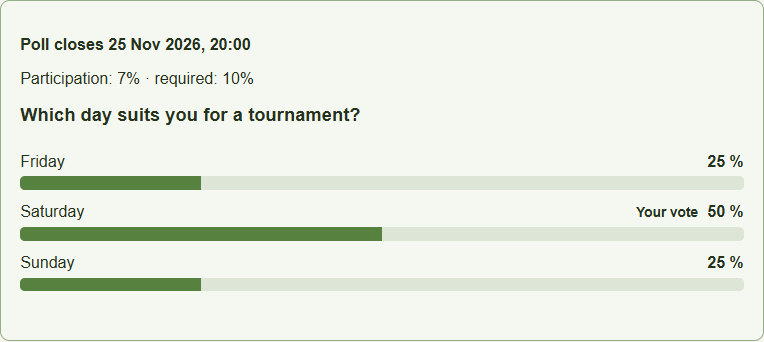
After voting, you see the bars and your chosen answer. Once the poll closes, everyone can see its result. If a minimum turnout was set, the percentage display shows whether it has been reached.
Example screens with fictional player names and illustrative data. Click an image to enlarge it.
Private notes
Private notes are independent of your friends and ignore lists. You can also add notes about players who are on neither list.
Step 1 / 2
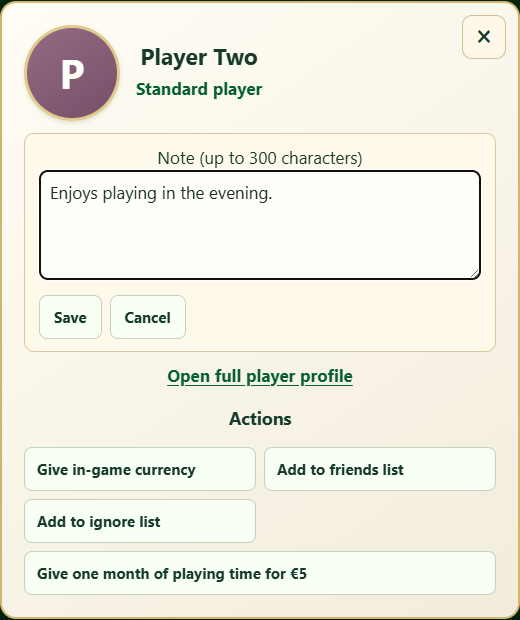
Click the player’s name, then choose “Add a note”. If a note already exists, click the pencil beside it to open the editor. Enter your text and click “Save”.
Step 2 / 2
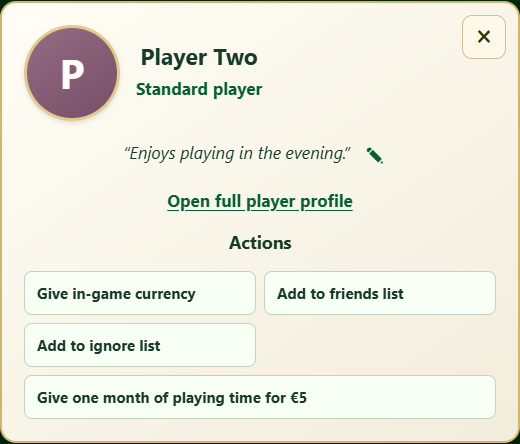
After saving, your note appears in italics and quotation marks in the player’s details. Click the pencil beside it to make changes. The note is private to you; it is not sent to the other player as a message.
Example screens with fictional player names and illustrative data. Click an image to enlarge it.
There are smaller improvements to familiar features, too:
The old dimming effect is gone. The new turn timer shows how much time remains for your action and turns red towards the end.
Get a notification on your computer for new private messages, a game or tournament that is ready, and someone knocking at your table – even while the game is in the background. Turn these notifications on in settings and allow them in your browser. Clicking a knock notification opens the game; you still decide whether to let the player in.
Menus, buttons and windows have a clearer layout, with a consistent Mahogany theme when selected. Small screens show your in-game currency and changes in a compact display.
Computer players plan their mandatory solos earlier in lists, instead of leaving them until the end as often.
The game loads more compactly and displays a loading message. Joining at the start of a new game no longer leaves another player’s cards on screen; reviewing the previous hand remains available. Season links and monthly views are corrected. Short help explains dealing, leading, anti-collusion restrictions and hosting.